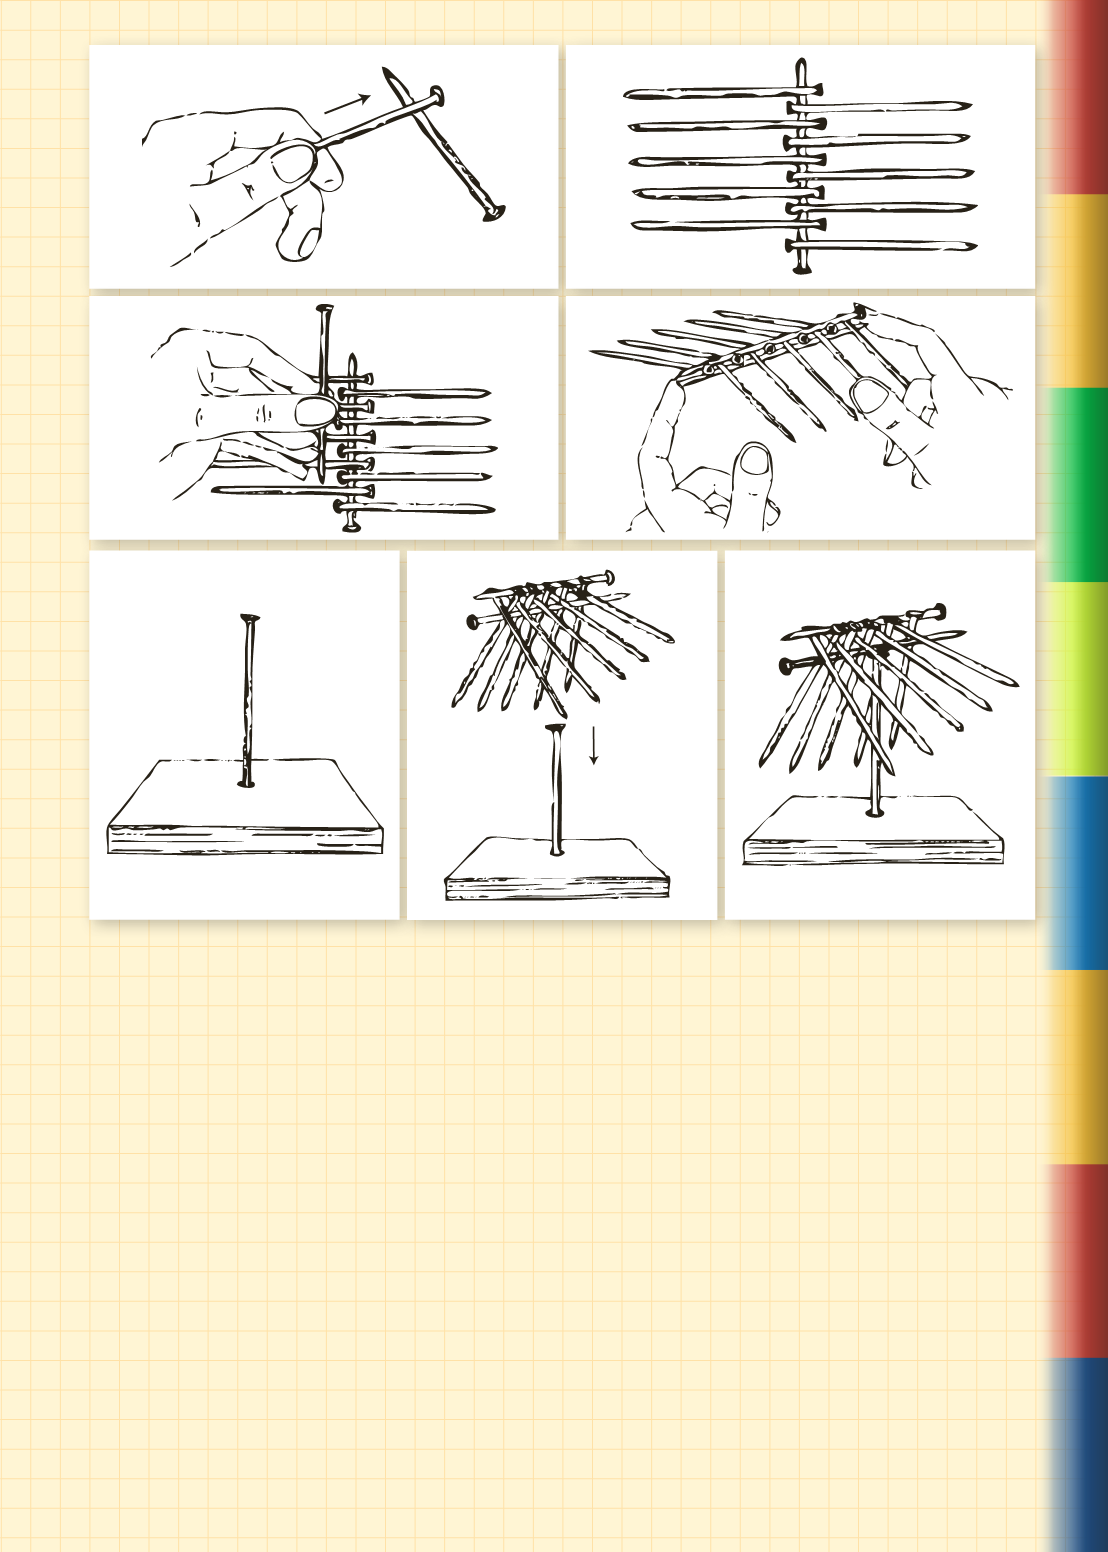
1. Prendete i 12 chiodi e cominciate a posizionarli come indi-
cato nella figura.
2. Continuate alternando i chiodi come illustrato nella figura 2.
Cinque chiodi con la testa a destra e cinque chiodi con la
testa a sinistra, alternati. Qui abbiamo usato 11 chiodi
3. Il dodicesimo chiodo va messo esattamente in parallelo con
il primo ma con la testa orientata al contrario. Questo chiodo
deve essere posato tra le teste dei chiodi alternati.
4. Ora, con gli indici prendete le estremità della costruzione
e, tenendo fermo il tutto sollevatela. Vedrete che i chiodi
tenderanno a disporsi come gli spioventi di un tetto, ma si
incastreranno tra di loro e non cadranno.
5. Ora prendete il pezzetto di legno con il chiodo piantato nel
mezzo.
6. Delicatamente appoggiate la struttura cercando di trovare il
punto di equilibrio della vostra creazione.
7. Nel momento in cui sarete riusciti a stabilire qual è il bari-
centro della struttura potrete lasciarla e vedrete che rimarrà
perfettamente in equilibrio.
1. Take the 12 nails and begin to position them as shown in
the figure.
2. Continue alternating the nails as shown in Figure 2. Five
nails with head to the right and five nails with head to the
left, alternating. Here we have used 11 nails
3. The twelfth nail should be placed exactly in parallel with the
first but with the head oriented opposite. This nail is to be
laid between the alternated nail heads.
4. Now, with your fingers take the ends of the structure and,
while holding, the lift it all. You will see that the nails tend
to be arranged like the eaves of a roof, but they will stay
together and will not fall.
5. Now, take the piece of wood with a nail stuck in the middle.
6. Gently place the structure on top trying to find the center of
gravity of your creation.
7. The moment you are able to determine what is the center
of gravity of the structure, can leave and you will see that it
will remain perfectly balanced.
1
3
5
7
2
4
6


